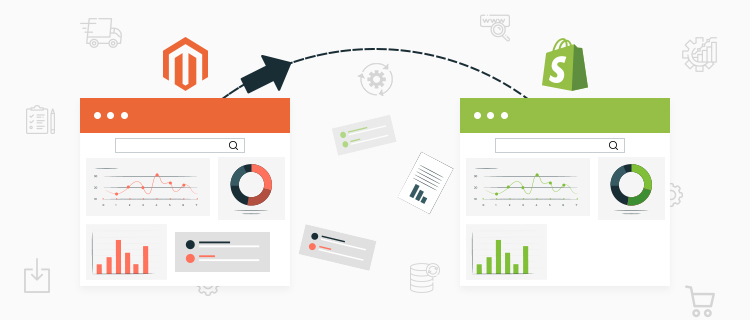
Magento has been the go-to solution for many enterprise stores for a long time. However, the trends in the e-commerce landscape have taken a slight turn in recent years. More stores are choosing to sign up on other platforms like Shopify – and for good reason!
As a host to more than 600,000 businesses worldwide, Shopify comes with plenty of perks. The platform is ergonomic, customizable with beautiful themes, and has a merchant-friendly interface. Migrating from Magento to Shopify also means you get to experience a higher level of data security, better inventory management, and unparalleled customer support.
If you’re looking to migrate your store to Shopify, here is a Magento to Shopify checklist to make sure you don’t leave out anything!
Please understand that this is just a high-level checklist/steps. Every store is unique and may require some additional steps. We recommend consulting a professional who is a Shopify expert for seamless migration. You can even reach out to us for tips on how to migrate your online store.
Steps for Magento to Shopify Migration
We have simplified your migration in 11 steps to ensure you switch stores smoothly without losing any data. Let’s dive right into them!
Step 1: Create Account on Shopify
The first step is to create an account on Shopify. The online store builder offers a 14-day free trial, so you can get an understanding of the platform.
Setting up your store on Shopify will also need you to understand the basics, features, page layouts, interfaces, menus, and more. Shopify also offers customer support round the clock, so if you face any issues, just drop them a text! If you are wondering how to start a Shopify store, here is our detailed guide on it.
Step 2: Backup Magento Store
You do not want to lose any web assets during your data migration from Magento to Shopify, which is why you must create a complete backup of your store on Magento.
This includes the custom and standard data that are pivotal for your new store. Having a backup ensures that your data stays secure and protected from any associated risks.
To create a backup, go to the Admin sidebar on your Magento dashboard, then follow the process – System>Tools>Backups>Desired backup. You can create a –
- System Backup: Complete backup of your database and file system.
- Database and Media Backup: Backup of the database and media files.
- Database Backup: Backup of just the database.
Step 3: Import Magento Store Content and Data to Shopify
Now that you have taken up the backup, it’s time to transfer your content and data. You can do this by –
- Copy and pasting content from Magento
- Using a migration app
- Creating an app that uses Admin API
- Using CSV files to transfer data manually
Ideally, you can transfer data manually if it’s in small quantities. However, if you need to relocate a huge amount of data, you will probably need a migration app.
It’s also important to know the order in which you transfer data. For example, if you need to import Historical Orders into Shopify along with Products and Customers, you must follow this order – first Products, then Customers, and then Historical Orders.
Following this order will give you access to the entire customer transaction journey. Also, consider hiring a professional who can help you with product migration for Magento to Shopify to make the process simpler for you.
Step 4: Organize Products
Once you’ve transferred your products to your new Shopify store, you need to make sure your migration from Magento to Shopify was error-free and accurate.
To cross-check the products, verify the product details and group your products into collections for easy discoverability. In case the transition wasn’t smooth, you can manually add Products or Customers from the admin panel.
Step 5: Add Theme to Website
Now we’re switching to the aesthetics of your new store. You can give your new store a makeover with customizable themes. Shopify’s theme store contains 10 free and 64 premium themes between $140 and $160 each.
To add a theme:
- Go to the Shopify Theme Store and find the theme that brings out your store’s vibe.
- Click “Add theme” if it’s a free theme or “Buy theme” if you’re going for a paid option.
Since paid themes are non-refundable, Shopify also gives you the option of trying it before you buy it.
You can also think of getting a custom-made design that will tweak the overall look and feel of your store. You can get in touch with us for developing a custom shopify theme.
Step 6: Transfer or Connect Your Domain
There are two ways you can make sure your customers land up on your Shopify store:
Transfer your domain: The first way is to transfer your third-party domain to Shopify. Shopify supports most domain transfers. You will be able to entirely control your domain settings on Shopify once you transfer it. You can pay and renew your domain on Shopify through Shopify admin with ease.
Connect your domain: Alternatively, you can also connect your third-party domain to your Shopify store. The only difference here is the management of your domain lies with your respective provider. You will still alter your domain settings, pay and renew the domain on your third-party provider’s platform.
Step 7: Set Up Shipping
Having your shipping rates and methods in place before you launch ensures you don’t end up in confrontations with your customers. You don’t want to overcharge them or issue refunds because of unclear shipping information.
- Shipping rates vary according to location. Set up your shipping address for accurate calculation.
- Configure shipping zones to cater to different locations.
- If you’re using carrier shipping rates, configure shipping dimensions.
- Set up standardized shipping rates for the zones.
You can handle the shipping yourself or get a third-party fulfilment service to do the job for you. It’s good to brainstorm shipping strategies and come up with the best one for your store.
Step 8: Set Up Payment Provider
To offer a seamless transaction experience, set up payment providers for your store. You can set up credit card payments or use Shopify’s own payment provider. The platform also offers integrations with some third-party payment providers.
- Select a payment provider.
- Enable Shopify Payments or third-party providers.
- Select how you want to capture and authorize payments.
Step 9: Place Test Orders to Check
Before you go live, it’s important to make sure everything runs smoothly. Place a few test orders to check whether the buying process is seamless from start to finish.
Running test orders will help you identify gaps and bugs that a customer may encounter while buying from your store. You can check orders for different scenarios like –
- Placing an order and cancelling it
- Refund initiation on cancelling
- Successful and failed payments
- Complete or partial fulfilment
Going on a test drive for different situations can also help you configure the notification customers will receive on each action.
Step 10: Set Up URL Redirects
Setting up URL redirects in Shopify is pretty easy and can be managed from the Shopify admin. So, when your customers enter the old address, they will automatically get redirected to your new store. This is to make sure you don’t lose out on revenue and old customers.
Having accurate redirects in place will help you retain your present search engine rankings and score.

One-stop solution for all your Shopify requirements!
Set up your Shopify store or migrate to one with Zestard’s Shopify Development services.
Step 11: Optimize Your Store
Your store is only as good as the traffic you get on it. That’s why having an optimally executed SEO is imperative to your store’s visibility.
Shopify, being the leading online store builder, is already built to utilize technical SEO efficiently. That said, there are a few ways you can also help your store’s search rankings:
- Use relevant keywords for your products, page titles, descriptions, posts, images, and image alt texts.
- Add your full domain (XML sitemap) to Google Search Console for easy indexing.
- Set up URL redirects, as mentioned above, and keep your online footfall at par.
- Create relevant content pieces for your store to increase chances for credible backlinks.
Shopify also offers some built-in SEO features for your assistance.
In Conclusion
Migrating your store to Shopify is like starting anew. Following this 11-step process will ensure your new Shopify store is up and running in no time. To summarize the key points:
- Ensure your store’s data safety during the migration.
- Take time to familiarize yourself with Shopify.
- Configure settings according to your needs.
- Style your store with themes and tools.
- Optimize your content.
While this may sound a daunting task at first, it doesn’t have to be. You can either set your store up by yourself from scratch or opt for Shopify experts to do it for you in a jiffy!
Zestard’s skilled Shopify developers are equipped to make your Magento to Shopify migration a breeze. From crafting themes that match your store’s essence to every touchpoint of your Shopify store development, we are there every step of the way!